Exchanger Maintenance during shutdown
A Heat Exchanger is a system that is used to transfer heat between two
or more liquids. Heat Exchangers are used in both cooling and heating
processes. Liquids may be separated from a solid wall to prevent mixing or they
may be in direct contact.
Type of Exchangers for
Shell and tube heat
Exchangers.
1. U Tube-type Exchangers
2. Fixed head Exchangers
3. Heat / Floating head type Exchanges
4. Reboiler Kettle type Exchangers 2. Fixed head Exchangers
3. Heat / Floating head type Exchanges
5. Double pipe heat exchangers.
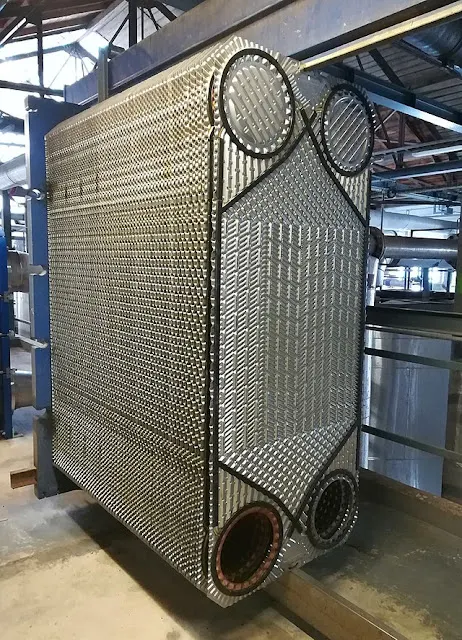
6. Plate heat exchangers.
7. Breech lock exchanger
8. Fin Fan cooler also type of Exchangers
Example of Exchangers
Fixed type Exchangers
U Bundle type
Heat Exchanger ( Floating head type )
Kettle type / Reboiler
Breech lock type heat exchanger
Fin Fan cooler also the type of Exchangers
Double Pipe Heat Exchangers.
Exchangers Parts and details
Parts of Exchangers1-Shell 2-Tube Bundle 3- Tube sheet 4-Tie Rod 5-Impingement plate 6- Baffle Plate 7-Floating Head 8-Front & Back Cover ( Channel head/Doom Cover) 9-Gasket 10- Split ring 11-Inlet/Outlet Nozzle.
The reboiler exchanger also has collar bolts,
The reboiler exchanger also has collar bolts,
Floating Head.
In general, the tubes in the heat exchanger undergoes expansion when there is a temperature gradient, now if both sides of the tubes are firmly fixed then it may bulge as there is no provision for expansion to avoid this the tube side bundle on one side of the heat exchanger is provided with floating head to facilitate the expansion of tubes.
Collar bolts
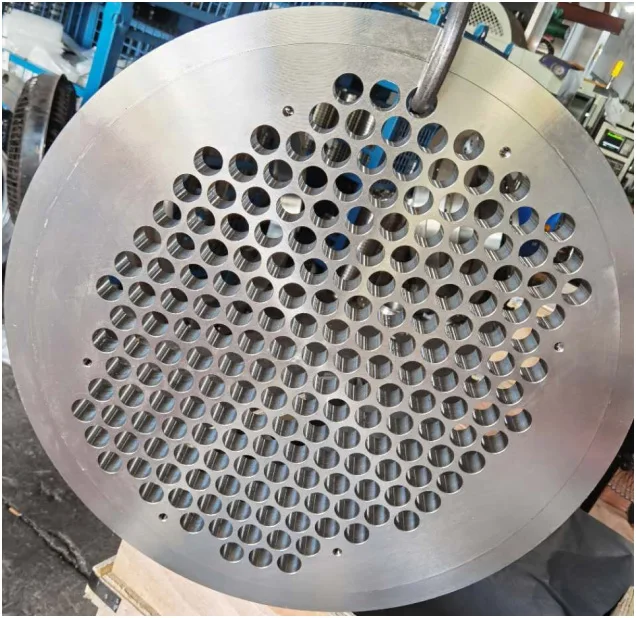
Tube sheet.
A tube sheet is one of the main components in a shell & tube heat exchanger. The tube sheet itself serves as a supporting element in heat exchangers. Tube sheets have different sizes and a series of holes are done to create a place where the tube ends are welded. Also called a tube plate. There are two types: floating tube sheets and stationary tube sheets.
Baffle Plate
It is a plate (usually perforated) that is installed under the inlet nozzle of the shell side of the heat exchanger so that the ingress fluid is not directly at the localized area of the tube bundle with the risk of causing localized corrosion (and damage).
Channel head & Dome cover
* First, open a work permit for blinding and do the blind all pipes connected to the exchanger.
* Make the marking for channel head to cell collar, after opening the channel head or doom cover back and front side.
* Make the marking for floating head to spilt ring and tube sheet then open the floating head.
* After all this, remove the tube bundle (use the bundle puller to remove the tube bundle).
* Tube bundle clean external and internal (the tube bundle and cell are cleaned with hydro jetting)
* Clean the cell inside, channel cover & head, floating by hydro jetting.
* After cleaning offer to the inspection team for NDT IRIS and others and wait for the inspection report.
* If found any type of repair does it immediately.
* Remember to inspect all the gasket raised faces is before installing the tube bundle back into the cell
* Fix the all gasket properly and reinstall the tube bundle.
* Install the test ring in the cell and start the cell side hydro test.
* After the cell test is completed, remove the test ring.
* Refix the floating head and front channel head.
* Prepare and start the tube test.
* Tube test ok then refix the channel cover and backside dome cover.
* Prepare the final test and perform the final test.
* All tests completed then do the de-blinding.
Fin fan Maintenance steps.
* Open the work permit and perform the blinding as per the blind list of inlet & outlet.
* Remove the plugs as per inspection required or remove all plugs.
* Clean the tube inside by hydro-jetting.
* After cleaning completed offer for inspection (IRIS, NDT, Eddy-current testing) if any repair or any inspection comment rectified immediately.
* With the force of air, remove all the remaining water inside the tube and dry the tube properly.
* Replace the plug immediately if the thread of the plug is defective, and if the plug header thread is damaged, re-trending by the tap set.
* Reinstall all plugs with a new washer ( Gasket) and all plugs tight properly by Ratchets.
* Perform the hydro test.
* Perform housekeeping remove all tools and materials and close work permit.
Hydrotest
Hydro test testing is a process in which components such as exchangers piping systems, and static devices are tested for power and leaks. Hydro tests are often required after shutdown and repair to ensure that the equipment will work under desired conditions after returning to service. In the heat exchanger total of 3 steps of the hydro test.1- Cell test 2- Tube test 3- Final test.After completing any job perform good housekeeping.
Remember, there is a permit for every work in the plant, so do not work without a permit.
Thank you
Any suggestions or comments please welcome them.
Remember, there is a permit for every work in the plant, so do not work without a permit.
Thank you
Any suggestions or comments please welcome them.


Comments
Post a Comment
rameshbhai.bamaniya@gmail.com